I make restaurant-style sides at home so I can control seasoning and doneness.
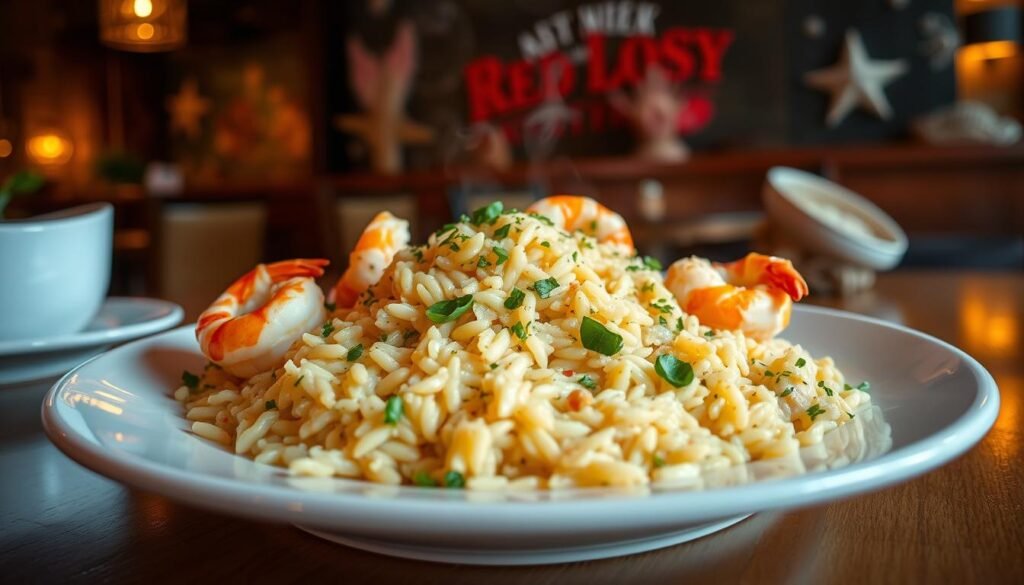
I picked this dish because the creamy version at red lobster feels like risotto: warm, buttery, and bright with a hint of lemon. I want that cozy, seafood-friendly result without turning the side into a heavy pasta plate.
In this guide I show two paths: a special-occasion method using lobster broth and a faster weeknight approach using chicken broth. Both aim for a silky texture and balanced flavor that pairs with fish or shellfish.
I’ll give clear ratios, timing in minutes, and the tools I use so people can replicate results. Expect a restaurant-style creamy method plus a simpler, reliable weeknight method you can repeat easily.
Key Takeaways
- I recreate the creamy side from red lobster with practical home steps.
- Two approaches: lobster-broth for special meals and chicken-broth for busy nights.
- Goals: buttery, cozy, and light enough to complement seafood.
- I provide exact ratios, tools, and minute-based timing to repeat success.
- This guide helps people control seasoning and final doneness at home.
Why I’m Recreating This Red Lobster Side Dish at Home
I recreate this restaurant-style side at home to fix common texture and flavor problems and to make a repeatable plate for seafood nights.
I use this softer, buttery side as part of a classic seafood meal in the United States. It pairs well with grilled fish or shrimp and helps balance brighter components like a crisp salad and warm cheddar bay biscuits.
How it fits a classic meal
The dish gives a comforting contrast to firmer protein. I treat it as one of several side dishes that round out the plate, alongside bread and greens.
What I wanted to improve
Customer feedback about red lobster sides often mentions blandness and inconsistent doneness. People say the texture swings between undercooked and mushy.
- I aim for clearer seasoning so flavor isn’t flat.
- I use strict timing, heat control, and stirring to fix texture issues.
- I finish the dish intentionally so it complements seafood instead of overpowering it.
This is my practical way to capture the restaurant vibe at home, but in a dependable, repeatable form.
What Orzo “Rice” Really Is (And Why the Texture Works)

This starts with a simple fact: the grain you see on the plate is actually small pasta, not true rice. It’s made from wheat, so it releases starch and reacts to heat like pasta rather than a grain.
How I explain the difference in the kitchen
I call it “rice” because the pieces look like grains, but I treat them like pasta when I check doneness. That visual nickname sticks, yet my cooking time and final bite follow pasta rules.
The creamy, risotto-style trick I use
My go-to method is the risotto-style: hot broth goes in a ladle at a time while I stir so starch builds a silky sauce. This shortens overall cook minutes compared with risotto, but gives the same smooth texture.
- Doneness cue: chew tests at the 7–10 minute mark—brands vary, so rely on bite, not the clock.
- Texture control: low heat and steady stirring keep it creamy, too much heat makes it gummy.
- One-cup habit: I add liquid slowly, one cup or ladle at a time when I want that restaurant finish.
My Take on the Flavor Profile: Butter, Broth, and Lemon

I build depth with butter and broth, then lift the whole dish with a bright citrus finish. This keeps the plate warm and cozy without making it greasy.
How I build a warm, buttery flavor without making it heavy
I start with a measured amount of butter for silkiness, then let hot broth provide most of the liquid and body. Using broth instead of extra cream keeps the texture light while still forming a sauce-like coating.
I season in steps with salt and pepper, tasting after the toasting and again after the first ladle of broth. That prevents flatness and keeps balance as the grain absorbs liquid.
I use zest when I want aroma without adding more liquid. A small squeeze of lemon juice goes in at the end for a clean lift that brightens the whole flavor profile.
- A spoonful of mascarpone-style cheese smooths the finish and makes the sauce cling without tanging the dish.
- Common mistake: adding too much lemon early mutes the buttery notes before the grain finishes cooking—so I hold acid until the very end.
orzo rice red lobster: What Makes the Restaurant Version “Unique”

What sets the plate apart is a focused trio: shell-made broth, a soft cheese finish, and a crisp topping.
The broth “secret” featured in copycat recipes
The secret is in the broth: simmering real shells in cups water builds a sweeter, deeper seafood backbone than plain stock. I toast shells in a pan, add two to three cups water, then simmer gently to pull maximum flavor.
The creamy finish: mascarpone-style richness
I use a small spoonful of soft cheese to smooth the sauce without making the side heavy. That bit of cheese gives silk and shine and keeps the overall texture light and clingy, not gluey.
The topping twist: panko crunch and optional chili oil heat
A scattering of toasted panko creates contrast: creamy base below, crisp top. I finish with a dot of chili oil for warmth—just a bit so it lifts flavor without stealing the shell-sweet broth or lemon brightness.
- Three key features: shell broth, mascarpone-smooth finish, toasted panko.
- I’ll show both the all-in shell-broth method and quicker shortcuts when I skip shells.
Ingredients I Use for My Copycat Orzo Rice

For this copycat, I keep the ingredient list flexible so the dish works for a special seafood night or a quick weeknight plate.
Seafood-forward route:
Shells, tails, and a true broth base
I use shells and tails to make a quick seafood broth that gives the dish a sweet, savory backbone. The meat is folded in at the end so it stays tender and bright.
Essentials for reliable flavor
Orzo, butter, garlic, shallots, salt, and pepper form the core. Toasting the orzo briefly in butter deepens the flavor before liquid goes in.
Flavor boosters:
Small additions for restaurant depth
I add a splash of white wine, a touch of miso, and a sprig of thyme when I want that layered, savory finish.
Easy swaps for weeknights:
Fast options that still taste intentional
- Chicken broth or water + bouillon for a quick base.
- Skip the wine and use extra broth plus lemon to brighten.
- These swaps keep it a simple side dish while preserving depth.
Kitchen Tools I Rely On for Consistent Results
I rely on a few reliable implements to keep cook time predictable and texture silky.
My must-haves are simple: a sturdy pot for broth, a wide skillet for toasting and cooking, a fine strainer, a wooden spoon, and accurate measuring cups. Each item helps me control evaporation, heat, and the final mouthfeel.
- Pot: I use it to simmer shells or stock so the liquid stays clear and golden.
- Skillet / pan: The wide surface speeds evaporation and shortens cook minutes when I toast the grain.
- Fine strainer: Non-negotiable for shell broth — it keeps tiny bits out and yields a clean base.
- Wooden spoon: It scrapes gently and prevents scorching while I stir in short increments.
- Measuring cups: Accurate ratios matter; one wrong cup and texture can flip from creamy to sticky.
Paying attention to time and measuring every cup is the way I repeat the results I want. Track minutes, don’t rush steps, and the dish will finish with the texture I aim for.
How I Make Lobster Broth for the Best Flavor
A quick sauté of shells is my secret to getting sweet, seafood-forward stock without a long simmer. I toast shells for just a few minutes to unlock aroma and add depth before the liquid goes in.
Extracting flavor with a short sauté and gentle simmer
I start in a hot pan with a tablespoon of oil and the shells. After 3–4 minutes I deglaze with a splash of white wine, then add about 6 cups water and aromatics—onion, celery, and a bay leaf.
I bring it to a gentle simmer and keep it low for roughly 40 minutes. That time pulls sweetness without concentrating bitter notes.
What a clear, golden broth looks like
Ready broth has a warm amber tone, minimal foam on top, and no cloudy sediment after straining. I strain through a fine sieve and expect roughly 4 cups of clean liquid for the dish.
Storing and freezing extra broth
Cool promptly, refrigerate up to 3 days, or freeze in measured portions for future side dishes. I freeze in 1-cup jars so thawing matches the recipe cups I need and saves time later.
My Step-by-Step Method for Creamy Orzo Rice
I walk through the exact sequence I follow so the final plate stays silky, bright, and reliably tender. Follow the order—toast, simmer, finish—to avoid flat flavor and uneven texture.
Toast first: melt butter in a wide pan over medium heat. Add the orzo and stir until pieces turn lightly golden, about 2–3 minutes. This gives a nutty flavor cue without burning.
Gradual broth additions: keep the broth hot on the side. Add one cup at a time, stirring so starch emulsifies into a creamy sauce. I use roughly 3–4 cups total and taste as I go. Count cook minutes from the first ladle; expect tender bite at 7–10 minutes depending on brand.
Finishing the dish
Turn heat to low. Stir in a spoonful of mascarpone-style cheese and a touch of miso for depth. Add lemon zest and a small squeeze of lemon juice to brighten the sauce. Fold in chopped parsley for freshness.
Adding the lobster
Gently fold in warm lobster pieces at the end and keep the pan off high heat. Low heat prevents toughness; lobster only needs a minute to warm through.
- Too thick: thin with a splash of hot broth, one tablespoon at a time.
- Too thin: simmer 1–2 extra minutes to reduce, stirring so the sauce clings.
- Too salty: balance with a tiny splash of lemon juice or a spoon of mascarpone-style cheese.
The Simple Orzo Rice Version I Make When I Don’t Have Lobster
If shells are out, I still want a comforting side that beats plain grains. This quick method saves time and keeps flavor focused so the plate feels complete.
My go-to ratio with jasmine rice + orzo + chicken broth for a fast side
Ratio: melt butter, toast 1/2 cup orzo, then stir in 1 cup jasmine rice and 2 1/4 cups chicken broth.
The covered simmer + rest method that gets the right bite and fluff
Bring to a boil, cover, and cook on low for 18 minutes. Do not open the lid during this time.
After 18 minutes, rest the pot, undisturbed, for 10 minutes. This finishing steam is the secret to a light, separate grain texture.
- I use this as a reliable simple side when weeknight time is tight.
- The blend of pasta and rice gives a pleasant bite that pairs well with salmon, shrimp, or grilled chicken.
- Swap: if I’m out of broth I use water plus chicken bouillon and taste for salt.
How I Serve This Side Dish with Seafood, Chicken, and “Red Lobster Night” Favorites
I choose pairings that keep the plate balanced and familiar. This side dish works best when it complements a main without stealing attention. I aim for contrast: buttery texture with bright acid and a crunchy element.
My favorite pairings: shrimp, salmon, grilled chicken, and light sauces
I often serve it with grilled salmon, garlic shrimp, or a simply seasoned grilled chicken. A light lemon-butter or white wine sauce keeps the plate bright and pairs well with seafood and poultry.
What I serve alongside for the full restaurant vibe
To build a home “Red Lobster” night I add cheddar bay biscuits, a simple green salad, and a scattering of toasted crumbs for crunch. The biscuits and the buttery side make the meal feel indulgent in a familiar way.
Portioning tips: side versus main-course bowls
For a side, I plate one modest scoop per person. For a main bowl, I add extra protein and two scoops, plus vegetables. Keep it slightly loose when serving; the dish thickens as it cools, so hold it warm for best texture.
Conclusion
My final thought: small, measured choices give you reliable restaurant-style results at home.
I recreate the red lobster-inspired orzo rice by prioritizing clear flavor, steady texture, and exact timing. I use shell-made broth when I can and a quick, simple side method when I can’t.
I solve common complaints—blandness and uneven doneness—by tasting for salt, tracking cook minutes, and controlling heat. The lobster route rewards weekends; the fast version saves time and still tastes intentional.
Serve this as a side most nights. Make it a main when I add protein and greens. Either way, small steps—toast, hot broth, a squeeze of lemon—make the dish sing.