Curious how close you can get to the real thing at home? I set out to build a practical, honest copycat that nails the big flavors: crisp greens, smoky bacon, tender grilled chicken, creamy avocado lime ranch, and that sweet pop from corn and tomatoes.
I call this a recipe post because I focus on simple steps and real-life swaps. You can make the full version from scratch or speed things up with nuggets or rotisserie chicken.
Timing is realistic: if I multitask, the whole bowl comes together in about 25 minutes, serves four, and lands in the high-300s calories per serving depending on brands and toppings.
Below I walk through ingredients, chicken method, eggs and bacon, dressing, assembly, and storage tips so your greens stay crisp and not watery.
Key Takeaways
- I explain what I mean by a copycat and what to expect from my at-home version.
- The post is a practical recipe with quick assembly and easy swaps for real life.
- Main flavor goals: crisp greens, smoky bacon, juicy chicken, and creamy dressing.
- Ready in roughly 25 minutes when you multitask—ideal for lunch or dinner.
- I cover both from-scratch and shortcut options plus storage tips to keep freshness.
Why I Keep Coming Back to This Copycat Cobb Salad at Home
This copycat chick-fil blend gives me the fast-food taste I crave with full control over ingredients. I can make the bowl quickly, tweak portions, and pick better produce without losing the familiar flavors.
What I’m trying to replicate from the store version
I aim for balanced toppings, satisfying protein, and a creamy, tangy dressing that ties every bite together. The goal is the same texture and flavor profile you expect, but made with clearer ingredients.
Why homemade wins for cost, quality, and customization
- Cost: Building this at home beats buying lunch out multiple times a week.
- Quality: I choose organic greens and pasture-raised eggs when I can.
- Custom: Swap bacon, add more veggies, or cut the dressing to fit your goals.
Who this is perfect for right now
This is ideal for busy weekdays and meal prep. It works if you want a high-protein, tasty meal that still feels indulgent. These recipes let you recreate the charm of the original while cooking on your own timeline.
What a Classic Cobb Salad Includes (and How Chick-fil-A Does It)
My version leans on structure: separate rows let each ingredient keep its texture until the fork brings them together. I build the bowl so every bite has contrast—crisp, creamy, and salty without being heavy.
The traditional lineup I follow
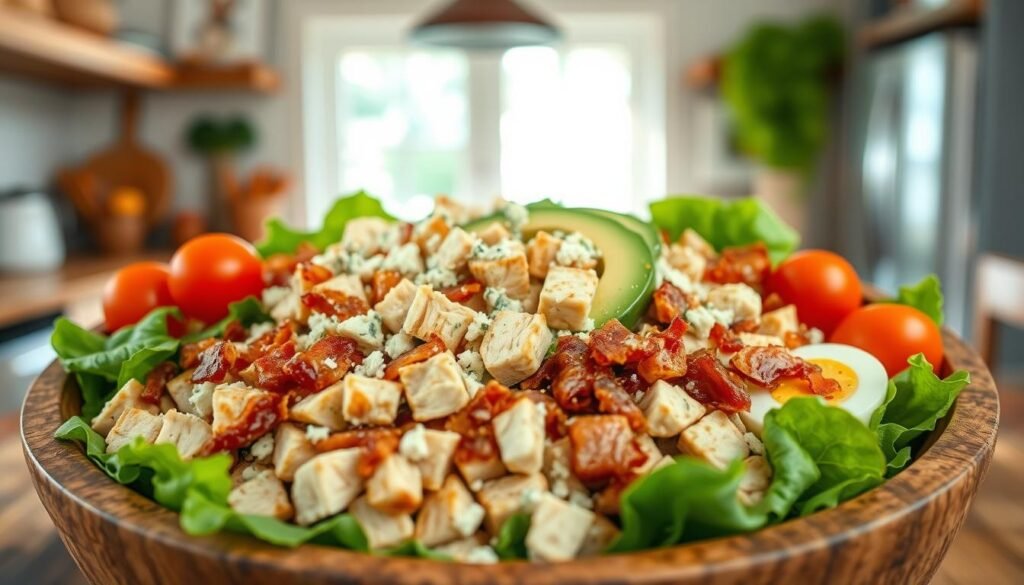
Classic components: a base of romaine and mixed greens, grilled chicken for protein, hard-boiled eggs for richness, crispy bacon for crunch, juicy tomatoes for freshness, cheese for salt, and ripe avocado for creaminess.
Restaurant-style touches I use
- I keep toppings in rows so textures stay distinct until serving.
- I balance crisp and creamy elements and add a splash of lime or vinegar for acidity.
- I offer blue cheese as the traditional punch, or Monterey Jack/cheddar for broader appeal.
- I dress lightly at first and distribute toppings evenly to avoid a heavy bowl.
This approach mirrors the approachable, ranch-forward build you often see from chick-fil bowls, while staying true to a classic cobb salad recipe. Next, I list the exact ingredients I use for easy shopping and prep.
Ingredients I Use for My chick-fil-a cobb salad
What I add to the bowl prioritizes texture first: crunch, cream, then a salty finish. Below I list the core ingredients I keep on hand, the measurements I use, and the easy swaps that save time or meet diet needs.
Greens and veggies
I use about 8 cups of lettuce total—usually romaine plus mixed greens for balance. Romaine gives crunch; mixed greens add a mild, leafy bite.
Veggie toppings: 1 cup halved cherry tomatoes (or grape tomatoes), 1 cup corn kernels, and 1/2 cup thinly sliced red onion. Each adds sweet, fresh, and sharp notes that lift the bowl.
Protein and toppings
Chicken is the main protein; I portion it into strips so one breast or two thighs serve four. I also plan for 4 hard-boiled eggs and 4 strips of bacon or turkey bacon for salty crunch.
Cheese options
Pick one: monterey jack for mild melt, cheddar for sharper flavor, or blue cheese for a classic tang. I use about 1/2 cup shredded or crumbled per 4 servings.
Dressing choices
My top pick is avocado lime ranch for the closest copycat taste. For a zippier finish I reach for lime ranch dressing. If convenience wins, ranch dressing works fine.
- Measurements: think cups, handfuls, or per-bowl portions to scale easily.
- Substitutions: use turkey bacon or omit cheese for dairy-free; skip corn and use extra greens for keto.
- Prep tip: cook chicken and eggs ahead, keep dressing separate to prevent soggy greens.
Quick Recipe Snapshot: Time, Servings, and Cooking Methods

My baseline timing is simple: roughly 10 minutes prep and 15 minutes cook for about 25 minutes total. I call this my run-through when I want a fast, reliable salad recipe for weeknight dinners.
Total time and difficulty
This is an easy meal. If I multitask, those 25 minutes feel relaxed, not rushed. I note minutes on my phone so I stay on track.
Cooking methods I rotate
- Grill chicken for that fresh-off-the-grill flavor.
- Boil eggs while the chicken rests; an ice bath stops carryover cooking.
- Skillet bacon crisps fast; use turkey bacon if you prefer.
- Air fryer nuggets save time and give great texture when I need speed.
Servings, scaling, and timeline
I usually make four servings and use roughly 1 to 2 cups of greens per person. To scale for one bowl, halve the proteins and stash extras for another meal.
- Start eggs (boil, then ice).
- Start bacon in skillet or preheat air fryer.
- Cook chicken (grill or air fry).
- Chop veggies and mix dressing.
- Assemble and serve.
What’s optional: charred corn vs canned, or rotisserie chicken instead of cooking from scratch. Next up I cover my chicken methods in detail.
How I Make the Chicken (Grilled, Rotisserie, or Air-Fried Nuggets)
For this bowl, the chicken sets the tone, so I pick a method that fits my time and cravings. I rotate between grilled strips, store-bought rotisserie chicken, or air-fried nuggets depending on the day.
My simple marinade and why each ingredient matters
Marinade: pickle juice, honey, garlic powder, paprika, salt, and pepper. The pickle juice gives tang and moisture, honey balances that with sweetness, and paprika brings color.
I let the chicken sit in this mix for about 15 minutes, or longer if I have time, to build flavor.
Grilling technique for juicy strips
Preheat the grill hot (around 500°F), oil the grates, and avoid crowding. Cook strips about 6–8 minutes per side until the internal temp hits 165°F.
Rest the meat for 5 minutes, then slice into neat pieces that layer well on the bowl.
Two quick shortcuts
- Rotisserie chicken — pull and shred for zero cooking.
- Air-fried nuggets — homemade at 380°F for ~15 minutes (flip halfway), or frozen at 375°F for 8–10 minutes until crisp.
Tip: Keep cooked nuggets or strips warm and dry so they stay crunchy until assembly. Next I move on to eggs and bacon so everything finishes together.
How I Prep Hard-Boiled Eggs and Bacon Without Stress

I keep hard-cooked eggs and crisp bacon on hand so assembling meals takes minutes. Clear steps make both proteins predictable and prevent greasy or overcooked results.
My hard-boiled egg method (and why I always use an ice bath)
Place eggs in a single layer and cover with cold water by about 1 inch. Bring to a rolling boil, remove from heat, cover, and let sit for 10–12 minutes depending on size and how firm you like your yolks.
Transfer immediately to an ice bath to stop cooking and make peeling clean. For easier peels, add a pinch of salt or a splash of vinegar to the boiling water before you cover.
How I cook bacon or turkey bacon until crispy
I pan-fry bacon in a skillet over medium heat for roughly 6–8 minutes, flipping once. For turkey bacon, follow the same timing but watch closely since slices can crisp faster.
When pieces are evenly browned and firm, move them to paper towels to drain and cool. This keeps grease off your greens so your bowls stay crisp.
How I chop and portion eggs and bacon for salads and meal prep
I quarter or chunk the eggs so they sit evenly on each bite. I chop bacon into small bits for even distribution without one overpowering forkful.
- Drain and cool: blot bacon before chopping.
- Portion: pack eggs and bacon in small containers for easy weekday assembly.
- Timing: both proteins keep well for several days in the fridge, cutting prep time for lunches and dinners.
Once proteins are ready, I move on to the dressing—it’s the final piece that makes this truly copycat.
My Avocado Lime Ranch Dressing (Creamy, Tangy, and Easy to Blend)
My go-to dressing turns simple ingredients into the silky finish that makes every bite sing.
Core flavor builders I use
- Avocado for richness and smooth texture.
- Greek yogurt for tang and body.
- Cilantro, lime juice, garlic, apple cider vinegar, and salt for balance.
- About 1/2 cup of yogurt per avocado keeps the mix creamy but pourable.
How I blend and adjust consistency
I blend avocado, Greek yogurt, cilantro, vinegar, lime juice (or lemon), garlic, and salt until perfectly smooth—about 30–45 seconds in a high-speed blender or food processor.
To thin the dressing for drizzling, I add a splash of cold water. To thicken it for dipping, I add more yogurt by the tablespoon.
Quick swaps and storage notes
If I’m short on lime, lemon works fine. If time is tight, bottled ranch dressing or plain ranch makes an easy backup. I call this my avocado lime ranch when I use lime, but I reach for plain ranch dressing when I want a quicker route.
Storage: keep the dressing airtight in the fridge up to 4 days. Shake or stir before using so the texture returns to silky smooth.
How I Assemble the Salad for That Chick-fil-A Look
The trick I use is to keep wet items separated until the last moment to preserve crunch. I start on a dry bed of romaine and mixed greens so the base stays crisp through plating and transport.
My layering order for the prettiest (and crunchiest) bowl
Layering order: lay down lettuce/greens, then arrange sliced chicken, quartered eggs, chopped bacon, corn, onion, tomatoes, and cheese in neat bands. This keeps moist toppings away from the lettuce until serving.
I use cherry or grape tomatoes depending on ripeness; I halve them so they’re bite-sized and drain any excess on paper towels first.
Portioning into bowls vs one big serving platter
For meal prep, I build individual bowls: about 2 cups greens, 3/4 cup chicken, 1/2 cup eggs and bacon combined, and 1/3 cup each of corn and tomatoes. I measure some items in cups so portions stay consistent.
For family-style, I arrange ingredients on one large platter in tidy rows so guests can pick and dress their portions. I drizzle dressing just before eating or serve it on the side to avoid soggy greens.
- Quick tip: keep dressing in small cups if you pack lunches.
- Neat rows = better presentation and balanced bites.
- Next: how I stop sogginess for good.
Tips I Use to Keep It Fresh, Crisp, and Not Watery
Keeping things crisp starts with a few simple habits I follow every time I make this bowl. These steps guard texture and flavor so the final plate tastes bright, not watered-down.
Why I always dry the lettuce completely
Drying matters: excess water dilutes dressing and makes leaves limp. I spin or pat the lettuce until no beads remain.
How I keep tomatoes, corn, and dressing from sogging the greens
I store juicy tomatoes and dressed corn in separate containers and add them just before serving. If I pack lunches, the dressing stays in its own cup until the last second.
Charred corn vs canned corn: what I choose and when
Charred corn gives smoky depth when I have the time. Canned corn is my fast swap for weeknights and meal prep—both work, but charred wins for flavor.
How I avoid overcooking chicken and eggs
I use a thermometer and pull chicken at 165°F, then rest before slicing. For eggs, I time, then chill in an ice bath so yolks stay tender, not rubbery.
- Quick practical tips: paper towels in containers, separate compartments for wet toppings, add dressing in the last minute.
- These small moves keep ingredients fresh and translate well to other salad recipes you make at home.
Meal Prep and Storage: How I Pack This Salad for the Week
My strategy is to prep core components once, then assemble vibrant bowls in minutes. That keeps lunches fast and tasting fresh all week.
How long it keeps in the fridge (and what I store separately)
I store most components for 3–4 days in airtight containers. Cooked chicken, hard-boiled eggs, and crisp bacon hold up well for that window.
I always keep dressing, juicy tomatoes, and sometimes corn separate so the greens never get soggy.
My go-to containers and dressing cups for grab-and-go lunches
I use sturdy airtight containers and 2-oz lidded cups for dressing. That combo makes true grab-and-go meal packing simple.
Make-ahead plan: prep chicken, eggs, bacon, and veggies in advance
- Cook or pull rotisserie chicken, then cool and portion.
- Boil eggs, chill in an ice bath, quarter for quick use.
- Crisp bacon or turkey bacon, blot and chop for even bites.
- Wash and dry greens; chop tomatoes and corn and store separately.
Portion ingredients into single-serve containers so final assembly takes just a few minutes. If I use nuggets, I keep them separate and add right before eating to keep them crisp.
Meal prep at home saves money and delivers better control over flavors and portions. Pack smart, and weekday meals will feel freshly made every time.
Conclusion
To close, I want to leave you with the simple formula I return to over and over.
This copycat chick-fil-a cobb salad hits cravings while giving me control over ingredients and portions. The base is always the same: crisp lettuce and greens, chicken, eggs, bacon, tomatoes, corn, cheese, and a creamy avocado dressing.
Pick grilled chicken, rotisserie, or nugget-style. Keep the dressing separate until serving to protect crunch. Swap turkey bacon, try blue cheese or monterey jack/cheddar, and add extra veggies to suit your week.
Make it tonight, tweak it to your taste, and save the recipe for busy weeks. It’s fast—about 25 minutes—high-protein, and perfect for meal prep.