I love turning classic comfort into something easier and bolder. This recipe swaps a traditional crust for a buttery, herby Cheddar Bay biscuit mix that creates a golden, cheesy top over a creamy filling. It tastes like a restaurant mashup right at home.
Choose your build: I often make a skillet drop-biscuit version baked around 400°F for a quick, rustic finish. For crowd-pleasing family dinners, I use a layered 9×13 no-stir casserole at 350°F.
The Cheddar Bay mix and its seasoning packet add garlicky, cheesy, herby notes. Sometimes I fold the seasoning into the dough; other times I brush it on after baking for extra flavor.
Key success factors: use an oven-safe dish, avoid overfilling, bake until the top is deep golden and the filling bubbles, then rest 8–10 minutes to let it set. This is ideal for busy weeknights and family meals when you want classic comfort without fuss.
Key Takeaways
- The biscuit-topped mashup delivers creamy filling under a savory Cheddar Bay crust.
- I offer two methods: skillet drop-biscuit (400°F) or 9×13 layered bake (350°F).
- Use the seasoning packet in the dough or brush on after baking for extra flavor.
- Bake until golden and bubbling, then rest 8–10 minutes before serving.
- Perfect for quick weeknight dinners and family-style comfort food.
Why I Love This Cheddar Bay Biscuit Twist on Classic Chicken Pot Pie
Swapping a thin pastry for a crown of cheesy, herbed biscuit dough instantly lifts this comfort classic. The cheddar bay biscuit topping gives the filling a buttery, garlicky edge that feels both homey and slightly upscale.
It’s a restaurant-style mashup: familiar chicken pot pie comfort meets that iconic cheddar bay aroma and savory bite. The result tastes like a go-to dinner that still surprises.
A cozy, family-friendly dinner that feels like a restaurant mashup
I reach for this version when I want minimal cleanup and maximum comfort. The bay biscuit crown browns nicely and delivers crunchy top notes against a creamy center.
Skillet vs. 9×13 casserole-style bake
- Skillet: faster browning, drop biscuits over hot filling, quick stovetop-to-oven finish.
- 9×13 casserole: layered, hands-off, great for feeding a crowd and for even, set centers.
- Texture trade-offs: fluffy biscuit tops versus bubbly edges and a set middle once the pie is baked through.
I choose method based on time, dishes, and whether I’m using an oven-safe skillet. Both deliver big comfort and bright cheddar bay flavor that keeps me coming back.
Key Ingredients for Big Comfort-Food Flavor

The right ingredients make this bake comforting and easy to scale. I focus on simple choices that layer savory, creamy, and cheesy notes.
Protein options I use: boneless skinless thighs or breasts for rich flavor, or quick shortcuts like rotisserie chicken or leftover turkey when I need speed. I aim for several cups of shredded or diced meat so the sauce coats every bite.
- Vegetable base: sautéed onion, celery, and carrots form a classic mirepoix. I fold in frozen peas at the end.
- Easy add-ins: mushrooms, green beans, potatoes, zucchini, or bell peppers for extra texture and color.
- Creamy filling essentials: butter and flour to build a roux, then chicken broth or stock to deepen flavor, finished with cream or milk for richness.
The star topping: I use Red Lobster Cheddar Bay biscuit mix as a shortcut. The seasoning packet can be mixed into the batter for a casserole or brushed on with garlic-herb butter after baking for a skillet method.
Finishers: sharp cheddar and chopped parsley brighten the top. Buttermilk in the batter makes the topping tender, while extra butter and the packet give that classic cheddar bay character.
Tools and Prep I Set Up Before I Start

I always set up my workspace so the oven time isn’t spent scrambling for tools. Good prep keeps the bake moving and makes the whole process calmer.
Basic gear I pull first
- 9×13 baking dish or an oven-safe skillet depending on the method.
- Mixing bowls, whisk or spoon, and measuring cups for accurate portions.
- A sheet pan as overflow insurance and a spatula for easy serving.
Why pan choice matters
The layered casserole needs a deep 9×13 dish so it can bake full without spilling. A cast-iron or oven-safe skillet works best for searing and a stovetop-to-oven finish.
Preheat and timing notes
My rule: preheat oven to 350°F for the no-stir casserole and 400°F for the skillet drop-biscuit method. I often melt butter in the pan while it warms.
Quick tip: shred hot meat with forks and measure veggies and liquids into cups before you start to save time.
Chicken Pot Pie with Red Lobster Biscuits: My Step-by-Step Method

Follow my sequence and the filling will stay creamy while the topping browns perfectly.
Season and cook the meat
I lightly season the chicken with paprika, garlic powder, onion powder, oregano, thyme, poultry seasoning, salt, and pepper.
I sear pieces 5–6 minutes per side to lock in flavor, then shred or chop them into bite-sized pieces. For a shortcut, I shred rotisserie chicken instead.
Sauté the mirepoix and build a roux
I sweat onion, celery, and carrots in butter for 5–7 minutes until soft.
Stir in flour and cook 1–2 minutes to remove the raw taste and thicken the filling.
Liquids, vegetables, and finishing
I whisk in chicken broth slowly to prevent lumps, then add cream or milk for richness.
I fold in the vegetables and shredded meat, adding peas at the end so they stay bright.
Biscuit topping rules and bake cues
I make the topping from a cheddar bay mix plus extra cheddar and buttermilk. For the skillet, I often omit the seasoning packet in the batter and instead bake at 400°F for 20–25 minutes.
When the biscuits are golden and the filling bubbles at the edges, I melt butter, stir in the seasoning packet, brush the tops, and rest about 10 minutes before serving so slices hold cleanly.
Two Easy Ways I Make It (Depending on My Schedule)

I pick between a quick skillet or a hands-off casserole depending on how much time I have.
One-pan skillet version
Fast, stovetop-to-oven: I cook the filling in a single skillet, top it with spoonfuls of biscuit mix, then slide it into the oven at 400°F.
The bake takes about 20–25 minutes. The biscuit islands brown and crisp while the base stays thick and creamy.
Layered 9×13 casserole
Hands-off, crowd-ready: I melt butter in the dish, layer shredded chicken and frozen vegetables, then pour a milk plus biscuit mix layer over top.
I finish by pouring broth mixed with cream of chicken soup over everything and bake at 350°F for 45–60 minutes until the center sets and the edges turn deep golden.
“Both methods deliver the same signature bay biscuit chicken flavor; choose texture or speed.”
- I use the skillet on busy weeknights.
- I use the 9×13 when I want to prep ahead or feed a group.
- Either way, measuring cups help keep the ratios right and butter in the batter keeps the top tender.
Timing, Bake Cues, and How I Know It’s Done
Knowing how long to leave the dish in the oven saves you from a soggy middle or a scorched top.
Typical bake time ranges and why minutes can vary
I count on about 20–25 minutes for a skillet method at 400°F after topping, and roughly 45–60 minutes at 350°F for a 9×13 layered casserole. In some deep, very full casseroles the time can stretch to 90 minutes.
- Why minutes vary: pan depth, cold ingredients, and liquid ratio change how long it takes to set.
- If you preheat oven and warm the filling slightly, the final baking minutes shorten a bit.
- A shallow dish bakes faster than a deep one, so adjust by watching cues rather than the clock alone.
Doneness signals I trust most
I look for bubbling around the edges, a set (not soupy) center, and tops that are deeply golden brown. For the biscuit topping I check there are no wet dough patches and the top feels firm when touched gently.
How I prevent overflow and what I do if the top browns too fast
For a very full dish I place a sheet pan on a lower rack to catch spills and avoid adding extra liquid beyond the recipe. If the top browns too fast, I tent loosely with foil, move the pan down one rack, and keep baking until the center is done.
Resting matters: I let the bake sit 8–10 minutes after it comes from the oven. A slight jiggle is fine; the filling will finish setting as it rests and slicing will be cleaner.
Flavor Upgrades and Recipe Variations I Actually Use
Small swaps and add-ins are my quickest route to brighter flavor and a heartier bake. They keep the base creamy while adding color and texture.
Vegetable ideas I rely on: mushrooms, zucchini or yellow squash, diced potatoes, green beans, and bell peppers all hold up well in a creamy filling.
I precook diced potatoes or cut them small so they finish at the same time as the rest of the filling. For denser veg, a quick steam or pan-sauté saves bake time and prevents undercooking.
Seafood riff I actually make
I sometimes swap salmon for chicken to create a lobster cheddar bay–inspired bake. The creamy base and the biscuit topping stay the same.
Adjust seasoning toward lemon, dill, and a touch less poultry spice, and shorten bake time if the fish is in larger flakes so it stays tender.
Shortcut topping swaps
If I can’t find a Cheddar Bay box, I use a plain biscuit mix or Bisquick-style mix and stir in sharp cheddar, garlic powder, and dried herbs to mimic that cheddar bay character.
- Tip: add extra cheese and parsley to the batter for a closer match.
- Keep it simple: these swaps save time and keep the recipe weeknight-friendly.
Dietary and Ingredient Substitutions That Still Taste Great
Simple ingredient changes let me keep the creamy center and golden biscuit top intact. I focus on texture first so the dish still feels like comfort food, not just a list of swaps.
How I make it gluten-free
Gluten-free bay biscuit mix is my go-to for the topping. I use a gluten-free Cheddar Bay Biscuit mix and replace regular flour in the roux with a gluten-free flour blend.
Watch browning closely and confirm the center is fully set. I always let it rest so the filling firms up before slicing.
Lighter filling swaps and reheating tips
I swap heavy cream for half-and-half or whole milk to cut richness. The filling can be slightly thinner, so I simmer a little longer or add a touch more gluten-free flour as a thickener.
- Keep flavor bold: boost herbs or lemon zest if richness is reduced.
- Reheat smart: add a splash of milk when warming to restore creaminess without sogginess.
Tip: focus on balance—texture (creamy base + biscuit top) makes substitutions feel like intentional upgrades.
What I Serve with This Pot Pie for a Full Family Dinner
A fresh, crunchy side helps cut through the creamy filling and cheesy top for a more balanced dinner. I aim for easy, low-prep additions that round out the plate and keep everyone happy at the table.
Simple sides that balance the richness
Salad: A garden salad of mixed greens, cucumber, and a light vinaigrette brightens the meal and refreshes the palate.
Steamed vegetables: Quick-steamed green beans or broccoli add color and a crisp bite without heavy seasoning.
Roasted options: If I want warm veg, I roast carrots or Brussels sprouts with olive oil and a pinch of salt.
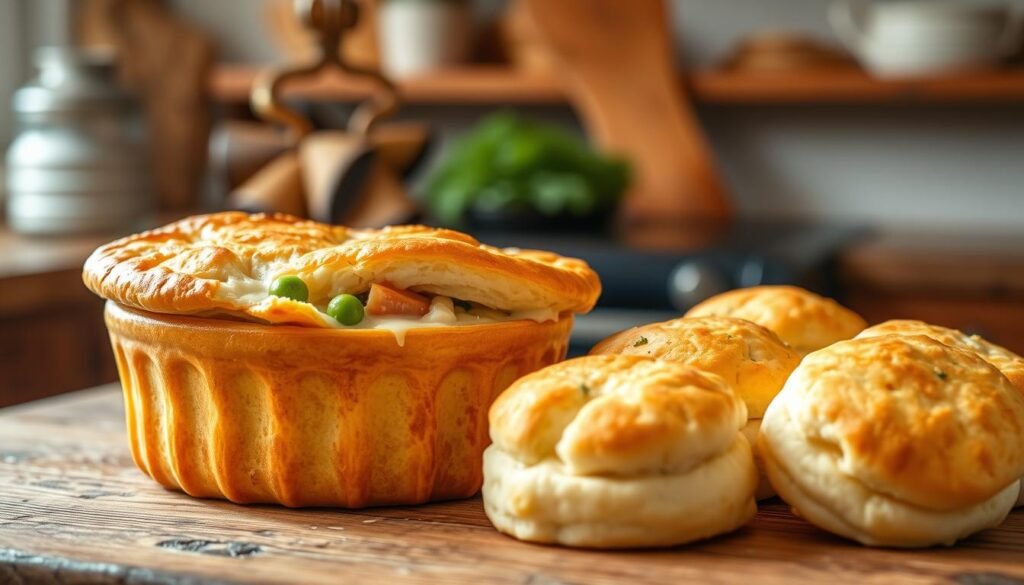
When I bake extra biscuits because everyone fights over the topping
I often bake an extra batch of cheddar bay biscuit dough on a sheet pan. That way the cheesy biscuit top remains special, and there are extras to share.
Timing tip: Start sides while the main rests so everything arrives hot. Plate each serving with plenty of top and a good mix of filling and vegetables for a balanced family dinner.
- Choose sides that complement, not compete, with a rich casserole.
- Keep prep minimal to save time on busy weeknights.
- Scoop servings so everyone gets both biscuit top and filling in each portion.
Conclusion
At the end of a busy day, this recipe gives me a hearty dinner that still feels special.
Two easy methods: I choose the quick skillet when time is short, or the 9×13 layered dish for a hands-off, crowd-friendly bake.
Success cues are simple: bake until golden and bubbling, then rest a few minutes so slices hold. A brush of melted butter and the cheddar bay mix finish the top beautifully.
Leftovers keep 3–4 days in an airtight container. Reheat in a 350°F oven until 165°F internal; add a splash of milk to loosen filling and tent foil if the top browns too fast. The microwave works in a pinch but can soften the topping.
Make it your own: swap in rotisserie protein, extra vegetables, lighter dairy, or a gluten-free mix and you still get the same comforting result. I use this dish for family dinners when I want big flavor and simple steps.